CO
DESIGNING
PROCESS.
During this project the group emphasized on co-design and made sure the design was personalized for the co-designer. Pim, our co-designer, was very enthusiastic and helped the group by answering questions or executing some tests. Moreover, physical and online meetings could easily be planned. This made the co-design process even better, since the more time you spend together, the more you will understand the reasoning behind certain choices.
Firstly, we had a conversation introducing each other to one another. During other meetings we showed some ideas we had in mind and Pim would give feedback on this. Next to that, we made some models of different handles and the mechanism we wanted to incorporate into the whole design. Pim tested these models and gave useful feedback. For more detailed information, check the document about Co-Design Methods and Results that can be downloaded on this page.

REQUIREMENTS.
Before we started our design process, a list of requirements was set up. This list has evolved during the whole process, aligning with the design challenge and the founding’s made. The disability of our co-designer played a big role in setting up these requirements. Over here you can see the final list of requirements.
REQUIREMENTS LIST
DOWNLOAD
CO-DESIGN METHODS & RESULTS
DOWNLOAD
IDEATION.
For the ideation everyone started drawing some ideas that came to their mind. The grabber was divided in three parts: the handle, the bar and the grabber. For each part different ideas were made. Furthermore, some ideas were made for organising products that Pim has on his table or in is kitchen. Since Pim had his focus on the grabber, more ideas for the grabber were ideated.
Eventually, after talking with Pim about it, it was concluded that we will continue with the grabber.


CONCEPTUALIZATION.
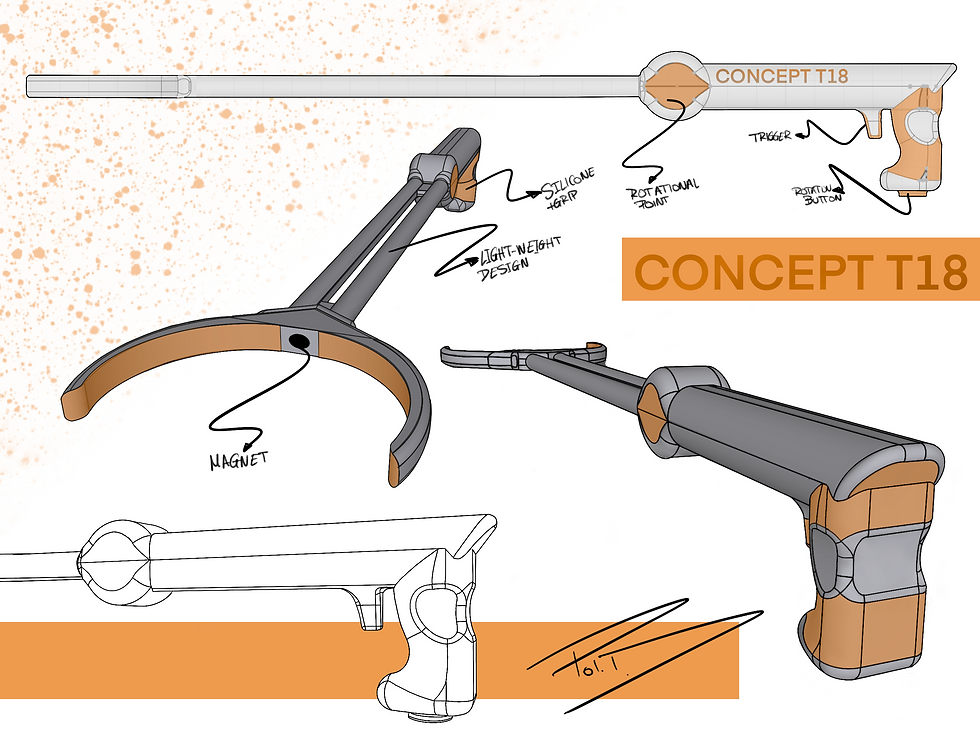
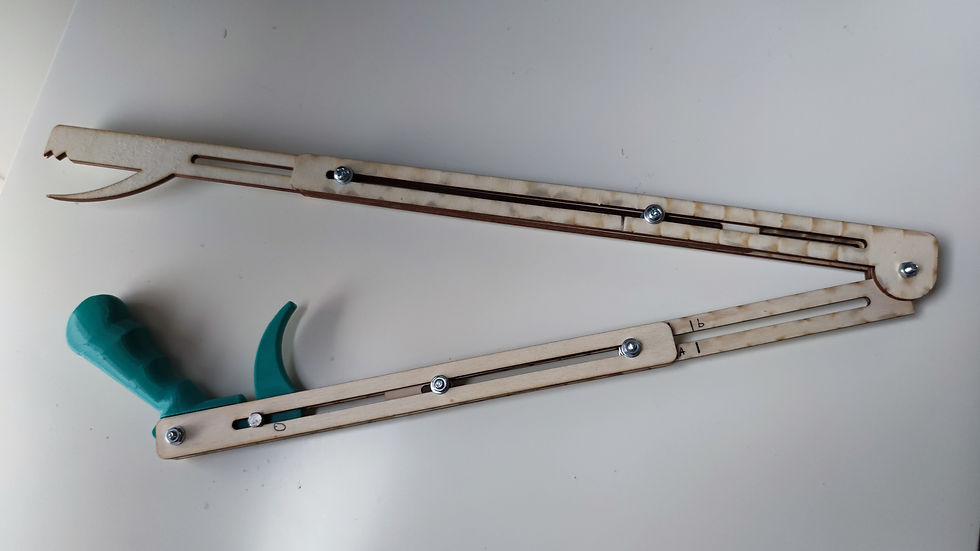
The conceptualization phase was not executed in the ‘traditional’ way as taught during the IDE program. The handle, bar and grabber were explored separately. For the handles different clay models were made while considering the measurements of his current grabber. We also let Pim mould a handle to his liking. With feedback from the clay models and Pim’s handle mould, we iterated and made improved design concepts. These concepts were prototyped at a higher fidelity and can be seen in the gallery below. These models yielded useful and focused feedback which steered us to create the final handle concept.


MODELS


HIGH FIDELITY MODELS
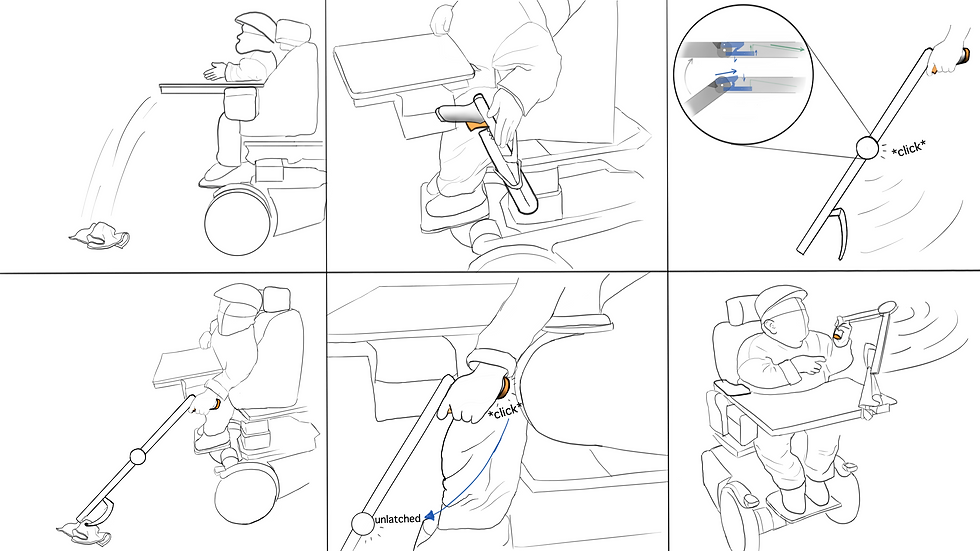
Additionally, models for the mechanism in the arm of the grabber were made. This mechanism utilizes gravity. The hinge will make sure the arm stays horizontal, and by turning the product 90 degrees the end of the grabber swings within the user's reach. The first model could not be tested properly because it was not comfortable for our co-designer. However, the co-designer was fond of this idea, so it was implemented in another model with a comfortable handle. In this way the mechanism could properly be tested. Upon testing, we discovered it was not possible for our user to easily rotate the grabber, so another solution was required. For more detailed information about the results of the co-design sessions, please go to ‘Co-Design’.

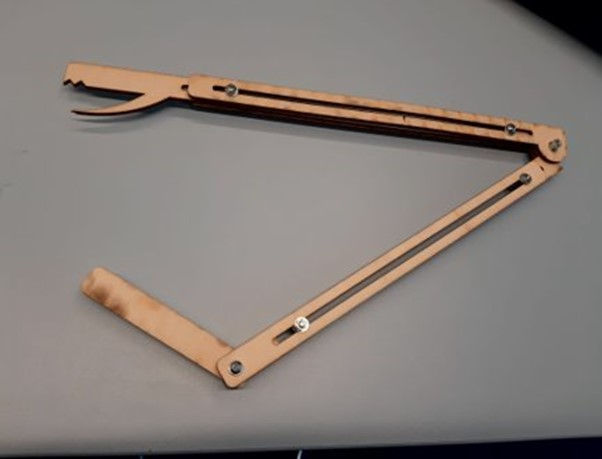

FINAL
CONCEPT.
To circumvent the challenge that Pim cannot fully rotate his wrist, a locking mechanism was implemented in the hinge and the handle was placed on the other side. This allows us to keep the folding arm aspect which is integral in minimising weight and the steps required to bring the item to his wheelchair. Additionally, the grabber can still be used in a standard manner while fully extended.
Various mechanisms were considered to lock the arm when straightened and release the lock. This can be seen under ‘Ideation’. The main constraints were the limited size as the locking mechanism had to fit inside the grabber and the weight of the mechanism as there was a weight limit we were designing under. So, the final mechanism concept was designed to be light and compact utilizing string and small 3D printed parts.
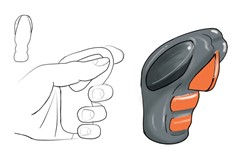
The refined final handle concept incorporates ergonomic finger indents based on the clay models and Pim’s hand mould. A thumb indent on either side is also included to increase the control and maneuverability of the grabber. Lastly, the trigger is kept at a sufficient distance to doubly assist with controlling the grabber.
As the various aspects of the grabber were segmented and worked on in parallel, they were always changing and being iterated upon. This means that the main concept design does not include the same detailing from the various aspects of the grabber.